

DIY Home Projects with Olive Wood: Unleashing Your Creativity with Sustainable Materials
Incorporating olive wood into your DIY home projects not only brings a touch of natural beauty and sophistication to your space but also supports sustainable practices. Olive wood is known for its distinctive grain patterns, durability, and resistance to moisture, making it an excellent choice for various home decor projects. Whether you’re an experienced DIY enthusiast or just starting, here are some simple and rewarding projects you can try with olive wood.
Why Choose Olive Wood for Your DIY Projects?
Before diving into the projects, it’s important to understand why olive wood is such a fantastic material for DIY projects:
1. Sustainability: Olive wood is typically harvested from trees that no longer produce fruit or from pruned branches, making it an eco-friendly choice.
2. Durability: Known for its hardness and longevity, olive wood items can last for generations with proper care.
3. Aesthetic Appeal: The unique and beautiful grain patterns of olive wood make each piece distinct, adding character to any project.
4. Versatility: Olive wood can be used in various applications, from small decorative items to larger furniture pieces.
Project 1: Olive Wood Coasters
Materials Needed:
• Olive wood slices (available from online retailers or specialty wood stores)
• Sandpaper (various grits)
• Food-safe wood finish or oil
Instructions:
1. Prepare the Wood Slices: Start by selecting olive wood slices that are roughly the same size and thickness. These slices should be around 1/4 to 1/2 inch thick.
2. Sand the Edges: Using medium-grit sandpaper, smooth the edges of the wood slices to remove any rough spots or splinters. Follow up with a finer grit to achieve a smooth finish.
3. Finish the Coasters: Apply a food-safe wood finish or oil to the coasters to enhance the wood’s natural grain and protect it from moisture. Allow the finish to dry according to the product instructions.
4. Optional Personalization: You can personalize your coasters by engraving initials or designs onto the surface using a wood-burning tool.
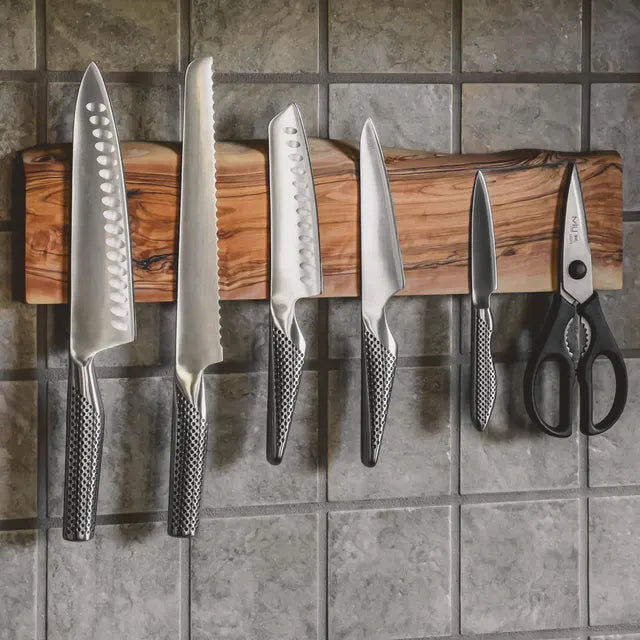
Project 2: Olive Wood and Resin Knife Holders
Materials Needed:
• Olive wood block (sized according to your preference)
• Epoxy resin kit
• Silicone mold (to fit the olive wood block)
• Sandpaper
• Wood finish or oil
Instructions:
1. Prepare the Olive Wood Block: Cut the olive wood block to your desired size for the knife holder. Sand the edges to smooth any rough spots.
2. Create the Resin Mold: Place the olive wood block in the silicone mold. Mix the epoxy resin according to the manufacturer’s instructions and pour it around the olive wood block, filling the mold.
3. Cure the Resin: Allow the resin to cure fully, which typically takes 24 to 48 hours.
4. Sand and Finish: Once the resin has cured, remove the knife holder from the mold and sand the resin surface until smooth. Finish the olive wood with a wood finish or oil.
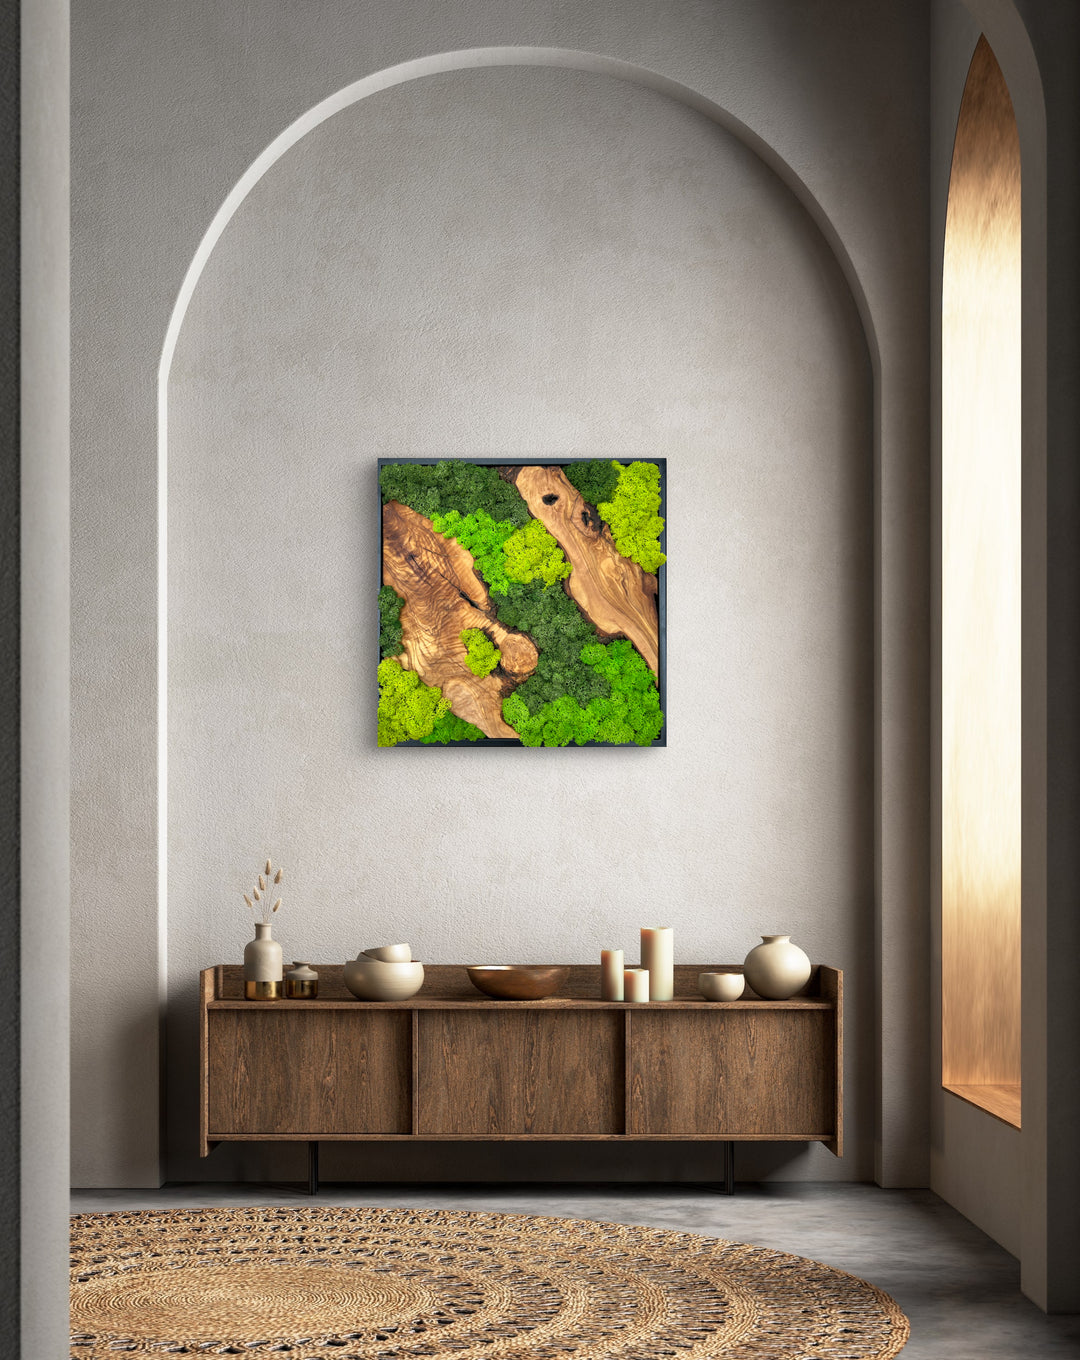
Project 3: Olive Wood and Resin Wall Clocks
Materials Needed:
• Olive wood slab
• Epoxy resin kit
• Clock mechanism kit
• Sandpaper
• Drill
• Wood finish or oil
Instructions:
1. Prepare the Olive Wood Slab: Choose an olive wood slab that fits your desired clock size. Sand the surface and edges until smooth.
2. Mix and Pour Resin: Mix the epoxy resin according to the manufacturer’s instructions. Pour the resin over the wood slab, filling any natural cracks or voids to create a smooth surface.
3. Cure the Resin: Allow the resin to cure completely, which usually takes about 24 to 48 hours.
4. Drill for Clock Mechanism: Once the resin is cured, drill a hole in the center of the slab to fit the clock mechanism.
5. Assemble the Clock: Attach the clock mechanism to the slab according to the kit instructions. Finish the wood with a wood finish or oil.
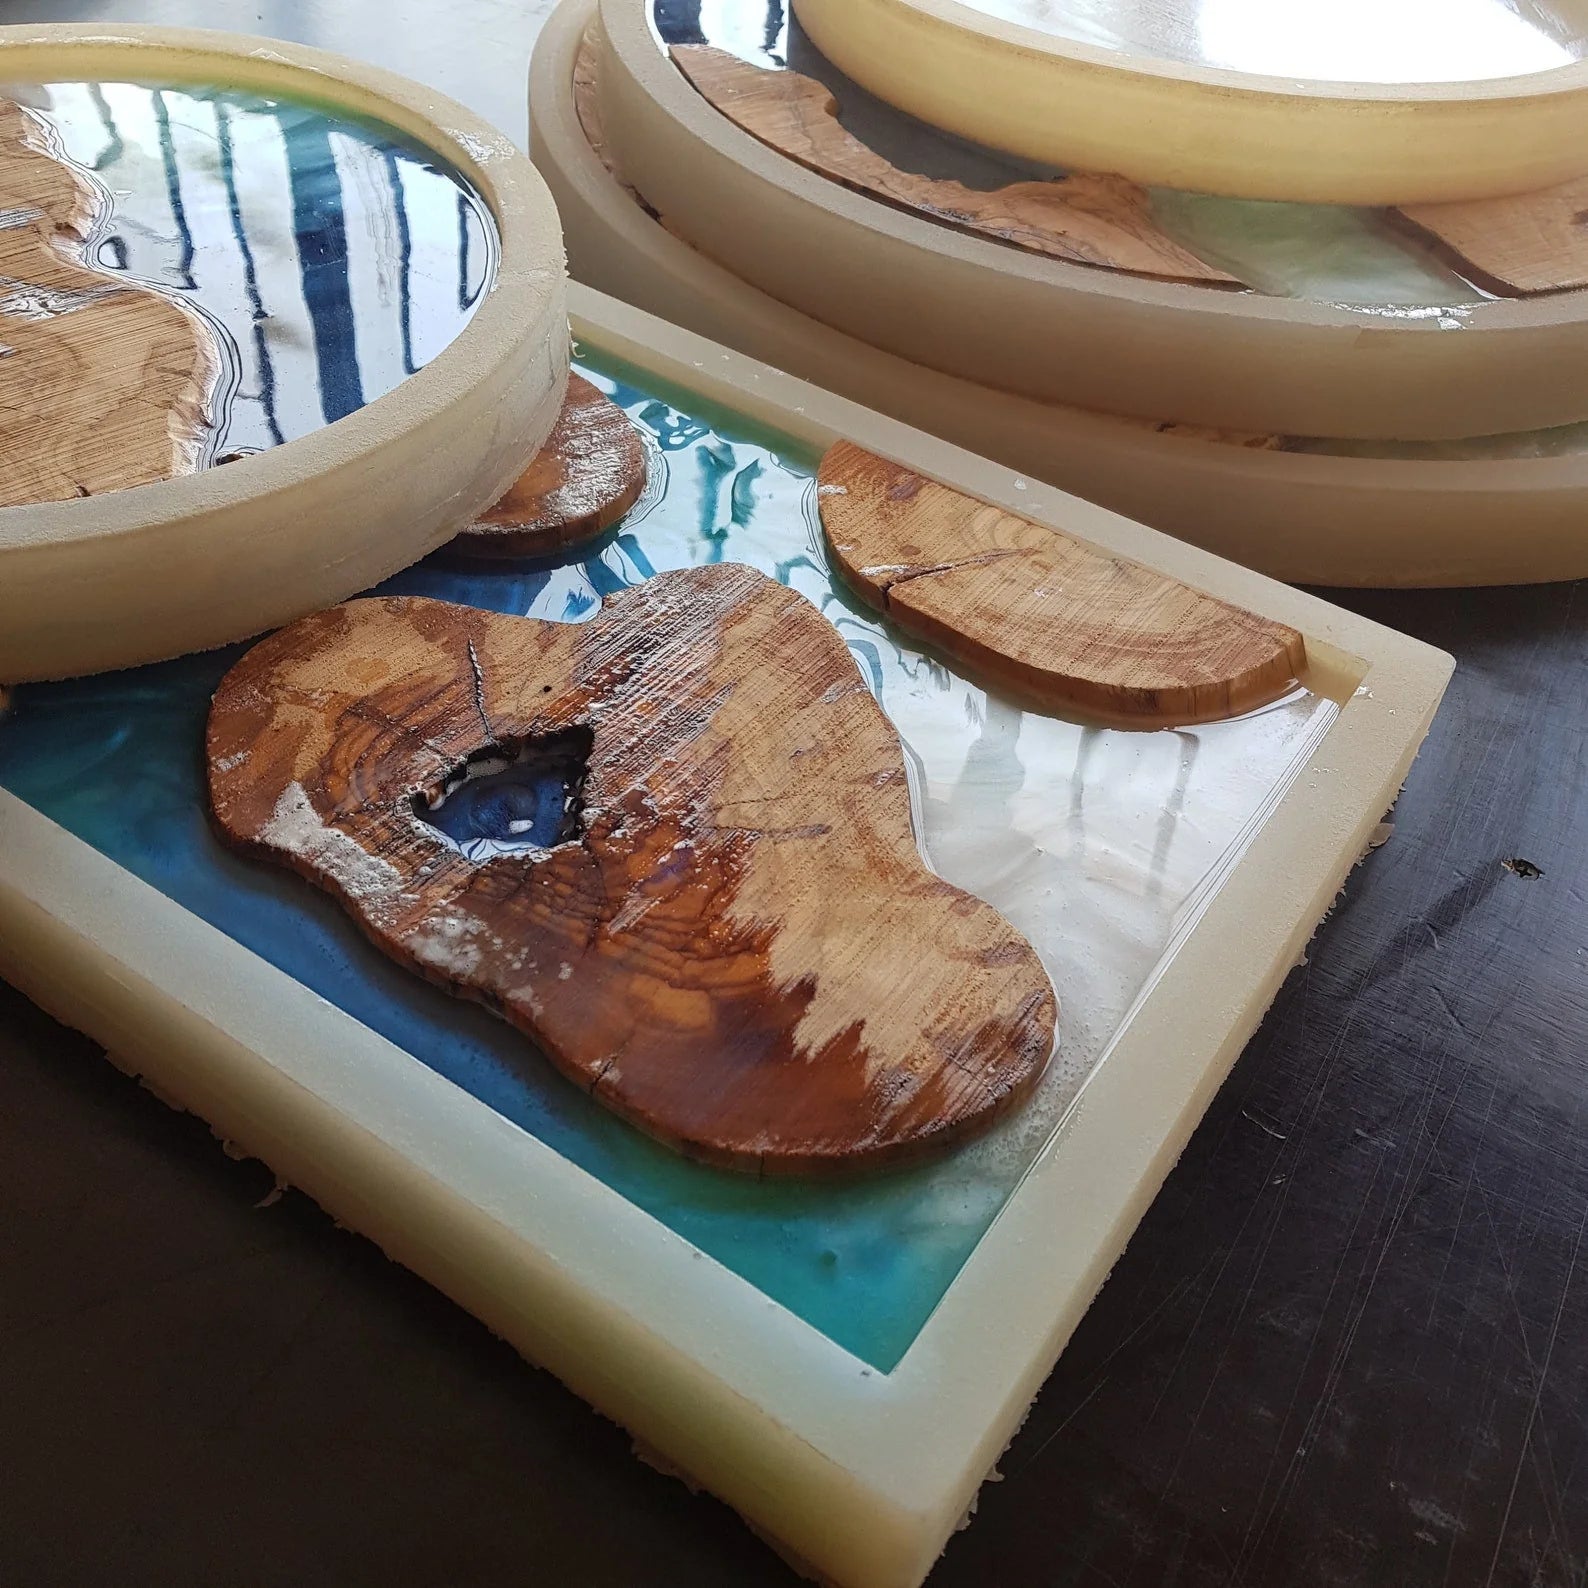
Project 4: Olive Wood and Resin Tables
Materials Needed:
• Olive wood slabs (sized for your desired table)
• Epoxy resin kit
• Table legs or base
• Sandpaper
• Wood finish or oil
Instructions:
1. Prepare the Olive Wood Slabs: Select and prepare olive wood slabs for the table. Sand the surfaces and edges until smooth.
2. Set Up for Resin Pouring: Arrange the wood slabs in a mold or on a surface where you will pour the resin. Ensure they are level and securely positioned.
3. Mix and Pour Resin: Mix the epoxy resin and pour it between the wood slabs to fill the gaps and create a smooth surface. This might require multiple pours depending on the thickness.
4. Cure the Resin: Allow the resin to cure completely, which can take several days depending on the thickness.
5. Sand and Finish: Sand the entire table surface, starting with coarse grit and progressing to fine grit for a smooth finish. Apply a wood finish or oil to enhance the wood’s natural beauty and protect it.
6. Attach Table Legs: Attach the table legs or base to the wood slab, ensuring they are securely fastened.
Tips for Working with Olive Wood
• Safety First: Always wear appropriate safety gear, such as gloves, goggles, and a mask when working with wood and resin.
• Choose the Right Tools: Use sharp, high-quality tools to make precise cuts and smooth finishes.
• Take Your Time: Allow sufficient curing time for resin to ensure a solid, durable finish.
• Experiment with Designs: Don’t be afraid to experiment with different designs and techniques to make each piece unique.
Conclusion
Olive wood offers an excellent opportunity to create stunning and sustainable DIY projects that can enhance your home decor. From coasters to tables, the unique beauty and durability of olive wood ensure that your handmade items will be cherished for years to come. By incorporating resin, you can add a modern twist to traditional woodworking, creating pieces that are not only functional but also works of art. Whether you’re making a simple coaster or an intricate table, olive wood and resin projects are a rewarding way to bring a touch of nature into your home.
Why Choose Olive Wood for Your DIY Projects?
Before diving into the projects, it’s important to understand why olive wood is such a fantastic material for DIY projects:
1. Sustainability: Olive wood is typically harvested from trees that no longer produce fruit or from pruned branches, making it an eco-friendly choice.
2. Durability: Known for its hardness and longevity, olive wood items can last for generations with proper care.
3. Aesthetic Appeal: The unique and beautiful grain patterns of olive wood make each piece distinct, adding character to any project.
4. Versatility: Olive wood can be used in various applications, from small decorative items to larger furniture pieces.
Project 1: Olive Wood Coasters
Materials Needed:
• Olive wood slices (available from online retailers or specialty wood stores)
• Sandpaper (various grits)
• Food-safe wood finish or oil
Instructions:
1. Prepare the Wood Slices: Start by selecting olive wood slices that are roughly the same size and thickness. These slices should be around 1/4 to 1/2 inch thick.
2. Sand the Edges: Using medium-grit sandpaper, smooth the edges of the wood slices to remove any rough spots or splinters. Follow up with a finer grit to achieve a smooth finish.
3. Finish the Coasters: Apply a food-safe wood finish or oil to the coasters to enhance the wood’s natural grain and protect it from moisture. Allow the finish to dry according to the product instructions.
4. Optional Personalization: You can personalize your coasters by engraving initials or designs onto the surface using a wood-burning tool.
Project 2: Olive Wood and Resin Knife Holders
Materials Needed:
• Olive wood block (sized according to your preference)
• Epoxy resin kit
• Silicone mold (to fit the olive wood block)
• Sandpaper
• Wood finish or oil
Instructions:
1. Prepare the Olive Wood Block: Cut the olive wood block to your desired size for the knife holder. Sand the edges to smooth any rough spots.
2. Create the Resin Mold: Place the olive wood block in the silicone mold. Mix the epoxy resin according to the manufacturer’s instructions and pour it around the olive wood block, filling the mold.
3. Cure the Resin: Allow the resin to cure fully, which typically takes 24 to 48 hours.
4. Sand and Finish: Once the resin has cured, remove the knife holder from the mold and sand the resin surface until smooth. Finish the olive wood with a wood finish or oil.
Project 3: Olive Wood and Resin Wall Clocks
Materials Needed:
• Olive wood slab
• Epoxy resin kit
• Clock mechanism kit
• Sandpaper
• Drill
• Wood finish or oil
Instructions:
1. Prepare the Olive Wood Slab: Choose an olive wood slab that fits your desired clock size. Sand the surface and edges until smooth.
2. Mix and Pour Resin: Mix the epoxy resin according to the manufacturer’s instructions. Pour the resin over the wood slab, filling any natural cracks or voids to create a smooth surface.
3. Cure the Resin: Allow the resin to cure completely, which usually takes about 24 to 48 hours.
4. Drill for Clock Mechanism: Once the resin is cured, drill a hole in the center of the slab to fit the clock mechanism.
5. Assemble the Clock: Attach the clock mechanism to the slab according to the kit instructions. Finish the wood with a wood finish or oil.
Project 4: Olive Wood and Resin Tables
Materials Needed:
• Olive wood slabs (sized for your desired table)
• Epoxy resin kit
• Table legs or base
• Sandpaper
• Wood finish or oil
Instructions:
1. Prepare the Olive Wood Slabs: Select and prepare olive wood slabs for the table. Sand the surfaces and edges until smooth.
2. Set Up for Resin Pouring: Arrange the wood slabs in a mold or on a surface where you will pour the resin. Ensure they are level and securely positioned.
3. Mix and Pour Resin: Mix the epoxy resin and pour it between the wood slabs to fill the gaps and create a smooth surface. This might require multiple pours depending on the thickness.
4. Cure the Resin: Allow the resin to cure completely, which can take several days depending on the thickness.
5. Sand and Finish: Sand the entire table surface, starting with coarse grit and progressing to fine grit for a smooth finish. Apply a wood finish or oil to enhance the wood’s natural beauty and protect it.
6. Attach Table Legs: Attach the table legs or base to the wood slab, ensuring they are securely fastened.
Tips for Working with Olive Wood
• Safety First: Always wear appropriate safety gear, such as gloves, goggles, and a mask when working with wood and resin.
• Choose the Right Tools: Use sharp, high-quality tools to make precise cuts and smooth finishes.
• Take Your Time: Allow sufficient curing time for resin to ensure a solid, durable finish.
• Experiment with Designs: Don’t be afraid to experiment with different designs and techniques to make each piece unique.
Conclusion
Olive wood offers an excellent opportunity to create stunning and sustainable DIY projects that can enhance your home decor. From coasters to tables, the unique beauty and durability of olive wood ensure that your handmade items will be cherished for years to come. By incorporating resin, you can add a modern twist to traditional woodworking, creating pieces that are not only functional but also works of art. Whether you’re making a simple coaster or an intricate table, olive wood and resin projects are a rewarding way to bring a touch of nature into your home.

Leave a comment